Reliably connecting Raspberry Pi to Internet — part 1
This is a first post of a series of articles on managing connectivity for small Linux devices.
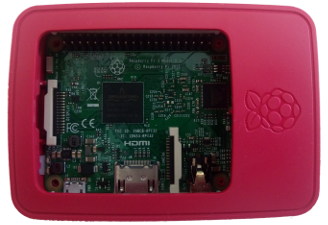
I needed to quickly come up with a solution for managing connected embedded devices. Our prototype was running on Raspberry Pi and we were considering a few other embedded systems. Our devices were equipped with WiFi and a cellular modem.
I’m one tutorial away from the solution, right?
First of all, we need the device to connect to internet and reconnect if the link drops. We started with a combination of a wvdial script and a systemd service that called the dialer. Systemd keeps trying even after failed attempts. You’ll probably want to increase RestartSec= or play with StartLimitIntervalSec= and StartLimitBurst=, otherwise systemd will give up after a few retries. Also, sometimes the ppp daemon is left running so we better kill it before starting wvdial and because we were using Huawei E3372 as our modem, we had to call usb-modeswitch ourselves to switch to the modem mode because the usb-modeswitch version available in Raspbian didn’t handle the udev event for this modem properly.
In the end, our script looked something like this
#!/bin/bash

usb_modeswitch -J …

sleep 2

killall pppd
wvdial pin  # unlocks the SIM

exec wvdial our_provider
Meh, not funny. Too brittle, if you ask me.
I’m still one tutorial away from the solution 😒
The next thing we wanted was to connect to the device via WiFi in order to test and configure it. This proved useful also in the field when the cell connectivity was not reliable enough for interactive session. OK, so we added records for our office network and for a temporary network we could create from our cell phone or laptops. On Raspbian, the WiFi networks are configured in /etc/wpa_supplicant/wpa_supplicant.conf.
network={
    ssid="YOUR_NETWORK_NAME"
    psk="YOUR_NETWORK_PASSWORD"
    key_mgmt=WPA-PSK
}
Easy. Now, the device connects to the right network when you need it. Not quite… After establishing the connection, you need to tell the system to actually use it for sending packages. This is done by setting up routes. You can view your route table by running
$ ip route
default via 192.168.1.1 dev enp2s0  proto static  metric 100
169.254.0.0/16 dev enp2s0  scope link  metric 1000
192.168.1.0/24 dev enp2s0  proto kernel  scope link  src 192.168.1.28  metric 100
The interesting part for us is the default route. It points to device that connects us to internet. Unfortunately, wpa_supplicant and wvdial both set up routes and their rules didn’t work well together for our use case. For example, if the device started with a known WiFi in range, wvdial would connect second, see there is already a route and not replace it. When the WiFi disappeared, it wouldn’t add the default route and systemd wouldn’t restart it because the connection is still happily on. We found out about a few other cases where this interaction hurt us.
NetworkManager saves the day
Now, it should be possible to script the correct behaviour for route management but because we had an OK experience with NetworkManager from desktop usage, we decided to give it a try. Installing NM on Raspian required adding ModemManager and some dependencies from jessie-backports repository (our Raspbian was based on Debian Jessie). But after fighting a bit with the installation and adding it into our custom image build, NetworkManager worked like a charm.
Edit: I tried it again now with a fresh build of Raspbian (from pi-gen) and the installation seems to work fine with just apt install network-manager. The current Raspbian is based on Debian 9 Stretch, whereas we were running off 8 Jessie.
Then, you need to remove all the interfaces you want to manage with NetworkManager from /etc/network/interfaces. Another option is to set managed=true in the ifupdown plugin configuration in /etc/NetworkManager/NetworkManager.conf. Once you have NM configured, restart it.
systemctl restart networking
systemctl restart NetworkManager
You can see the status via nmcli device and you specify known WiFi networks as files in /etc/NetworkManager/system-connections. It automatically prioritizes ethernet > WiFi > cellular and handles routing properly re. various networks’ connects and disconnects. As an added bonus, jessie-backports contained a version of usb-modeswitch that worked well with our modems so the whole experience became really “plug and play”.
Now, when the device boots up, it connects to internet via the cell connection and for debugging, we can connect to it via common wired or wireless network.
Edit: Read the followup post about accessing the device deployed in the field, hidden behind mobile carrier’s NATs.

filip at sedlakovi.org - @koraalkrabba
Filip helps companies with a lean infrastructure to test their prototypes but also with scaling issues like high availability, cost optimization and performance tuning. He co-founded NeuronSW, an AI startup.
If you agree with the post, disagree, or just want to say hi, drop me a line: filip at sedlakovi.org